


Are you tired of learning Java and have never implemented any practically useful thing? In this blog, we would be building a basic project using Spring Boot that helps you understand how to develop real-world applications in Java.
What actually is this project?
I am sure it must have happened, that you opened a website( or any URL) and it didn't open up. And you must have wondered whether is the website down for me (because of some firewall issue or ISP issue) or is it the case for everyone? In that case, you mostly contact your friend and ask him to also check the website.
Instead of contacting anyone else, you can take the help of some websites which provide similar service. Various free services provide similar services like downforeveryoneorjustme.com, isitdownrightnow.com, etc.
In this project, we are going to build a similar backend service that would return the status of a given URL.
Why Spring Boot?
Spring Boot is the most popular Java framework. Compared to various other Java Web Frameworks, it requires a lot fewer configurations to be done and a lot of things are Autoconfigured. Thus it is also very easy to get started with it, thus reducing the development time and increases efficiency.
What will we learn from this project?
By the end of this blog, you would be having a basic understanding of Spring Boot and some real-world applications of Java.
Prerequisites
- Knowledge of basic Java
- Must have the following things installed on your system
- Java 8+
- Intellij Idea (or any other Java IDE would also work)
Steps
Step-1: Create a Spring Boot Project
Create a basic spring boot project template.
To do so visit start.spring.io and you'll see a form as shown below.
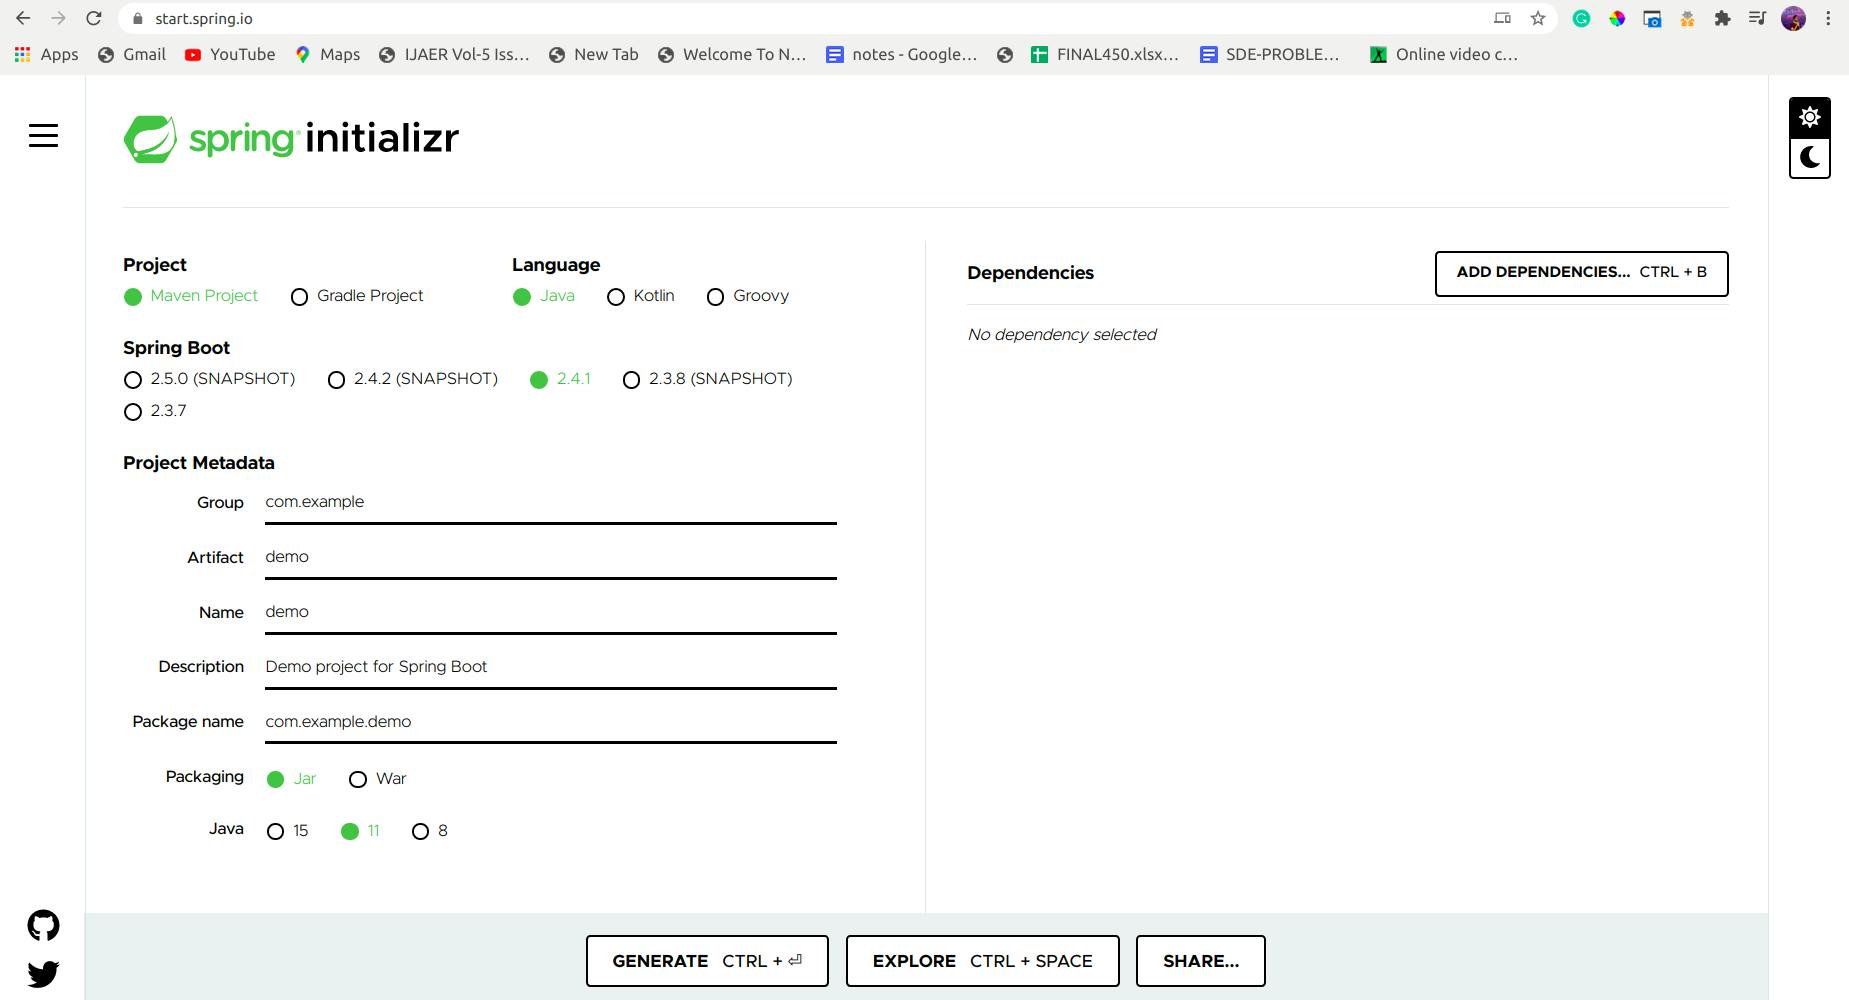
Then, you can add the details as follows:-
- Project: Maven
- Language: Java
- Spring Boot: 2.4.1
- Project Metadata:
- Group: com.thesagarsehgal (you can change it as per your intrest)
- Artifact: isWebsiteDown
- Name: isWebsiteDown
- Description: Checks if the given website is down or not
- Package name: com.thesagarsehgal.isWebsiteDown
- Packaging: JAR
- Java: 11 (you can change it as per JDK installed in your system)
- Dependencies:
- Spring Web
After, completing the above steps, the page would look like this
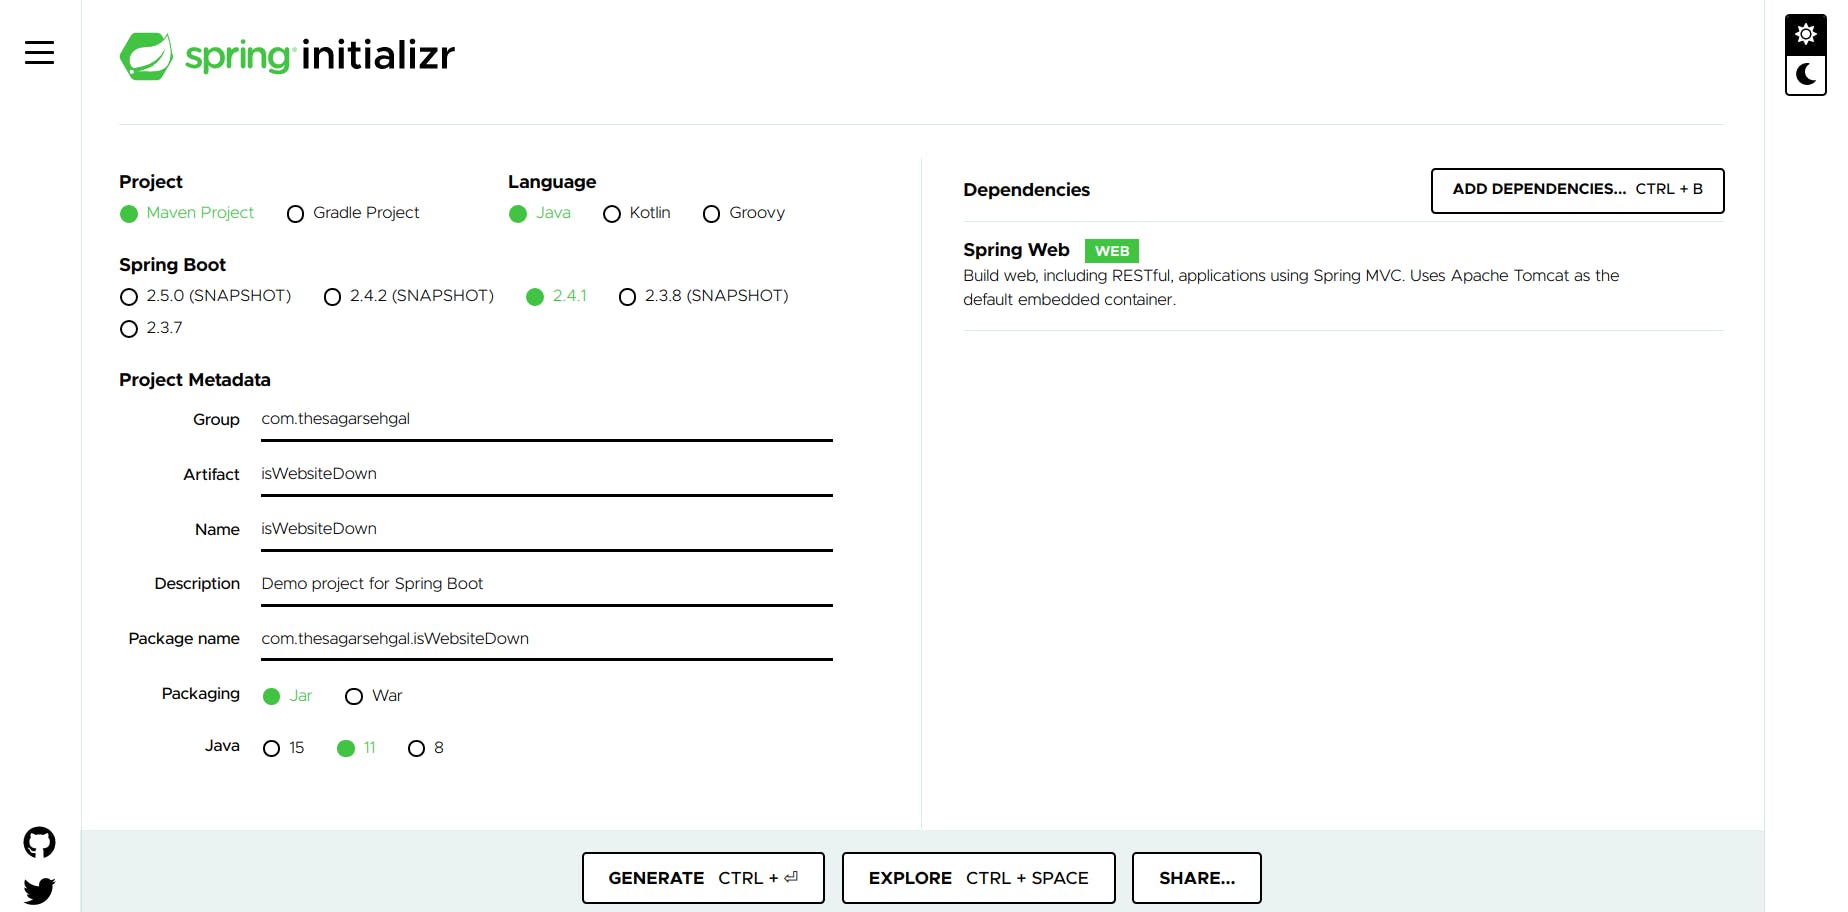
Now, click on Generate, and it would download the project zip.
Extract the zip folder
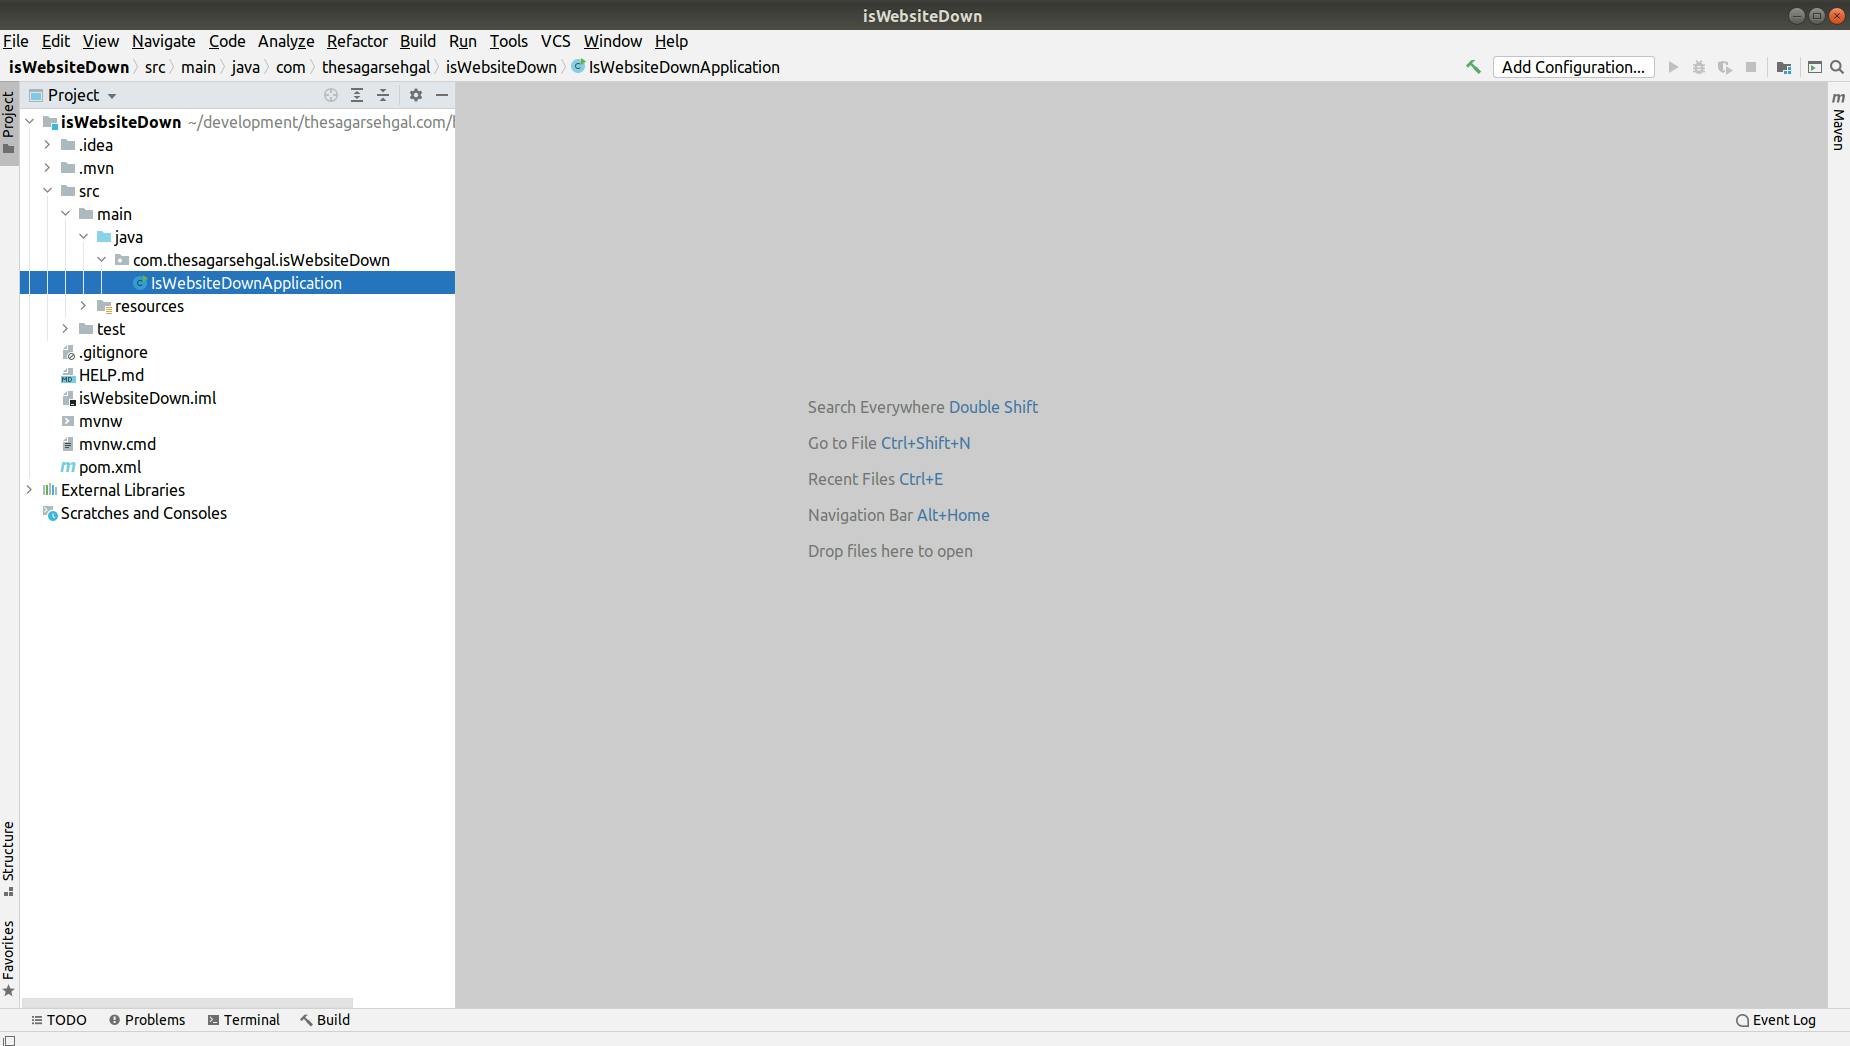
Open the extracted folder in Intellij Idea.
After opening the project in Intellij Idea, it would take some time to install the dependencies. And after that, it would look something like this:
Step-2: Creating a basic controller class file
What is a controller? When a request is made to an application, it is received by the controller, and the controller only is responsible for returning the response to that request. The controller only has the responsibility of performing various operations based on the info it has received.
Now, open the file,
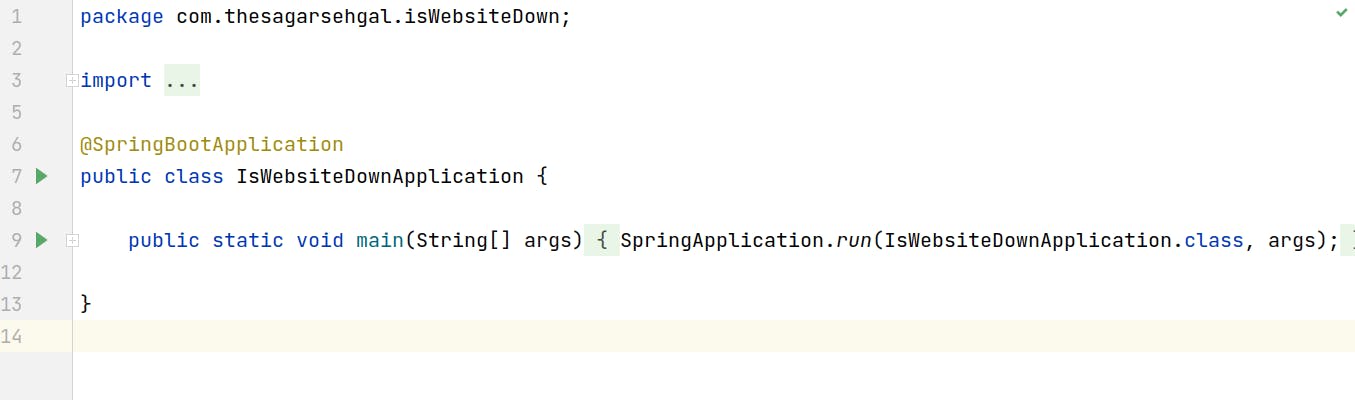
IsWebsiteDownApplication.javawhich can be done at the following file pathsrc > main > java > com.thesagarsehgal.isWebsiteDown > IsWebsiteDownApplication.javaCreate a package in
com.thesagarsehgal.isWebsiteDownwith the namecontroller(This is not a compulsory step ... just a good step towards maintainability)Create a class inside the
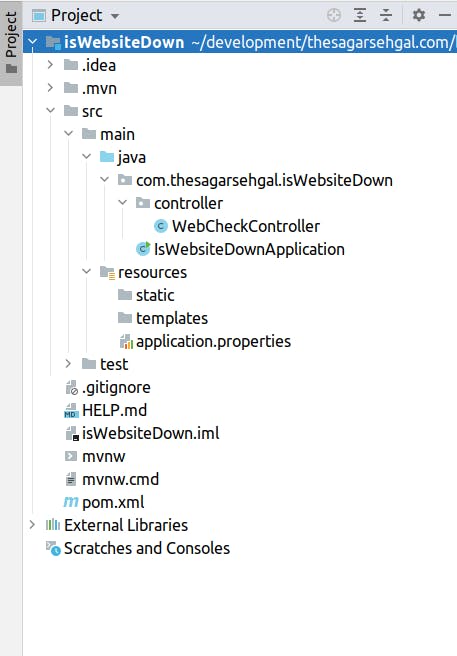
controllerpackage with the nameWebCheckControllerThe Project Structure now, would look something similar to this
Step-3: Define a basic Controller
- Open the
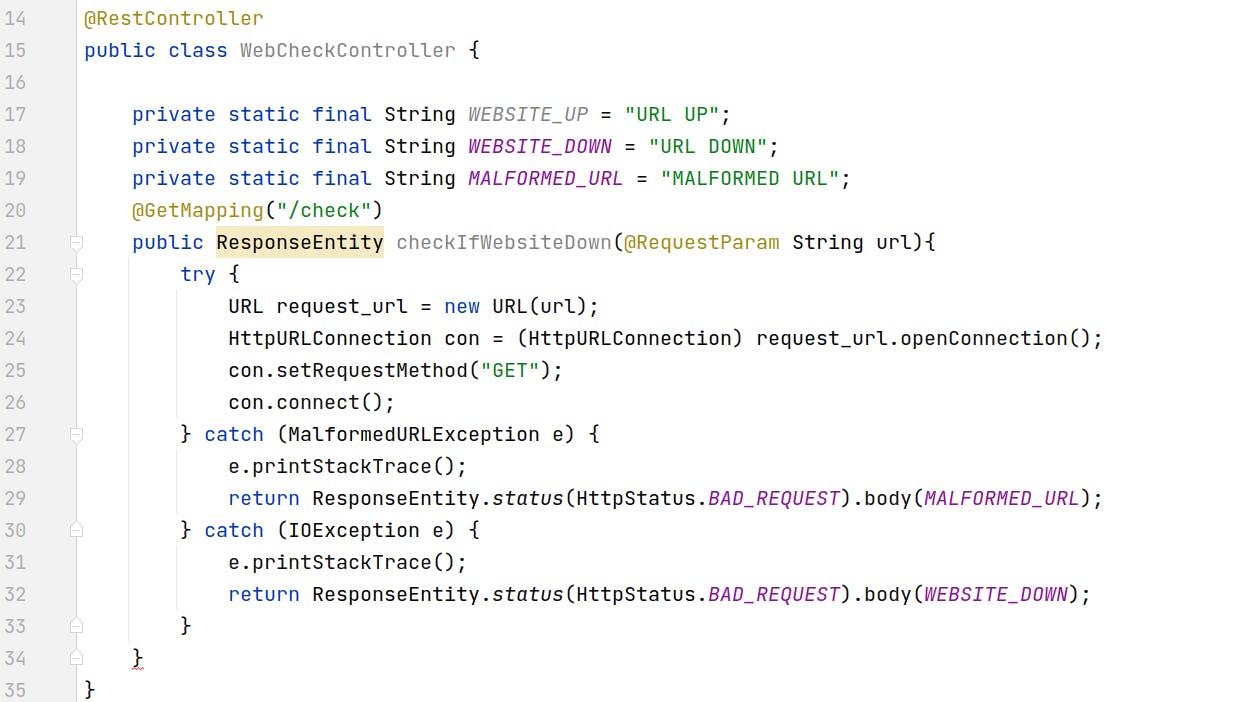
WebCheckController.javafile and update it to make a controller that returns whatever it gets. You can have a look at the method as follows:
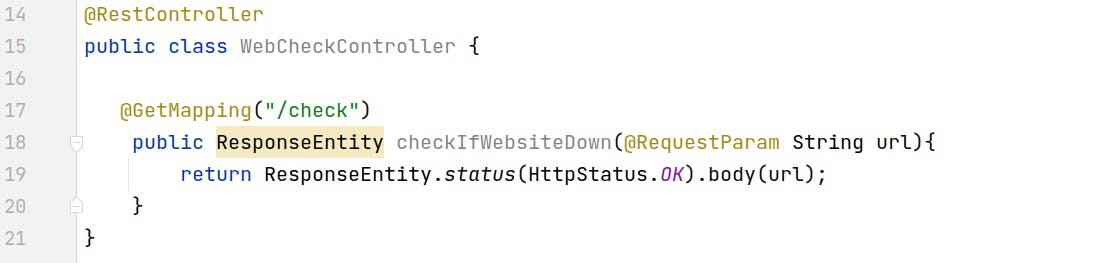
The annotation
@RestControllerabove the class, makes it a Controller class.The annotation
@GetMapping("/check")defines the type of endpoint a method would be taking care of. Similarly, we can have more annotation for more types of requests like@GetMappinghandles GET Request,@PostMappinghandles POST Request,@PutMappinghandles PUT Request, and so on .... . Further, here the "/check" is the path for which the function would be running.The argument of the function
@RequestParam String urlis the value that we would be passing from the request.@RequestParamrefers to the parameters specifier in the URL itself. For eg:- In the URLhttp://localhost:8080/path?key=value, the "key" is a Request Parameter and its value is "value". Similarly, in this case, the URL for which we want to check availability would be specified in the request itself as a Request Parameter.ResponseEntityrepresents an HTTP response, including headers, body, and status. As of now, in the ResponseEntity which we are returning, we would be sending a Response Status of 200 (OK) and along with the URL which we received in the request itself.
Time for Basic Testing
Start the server. For starting the server, follow the following steps:-
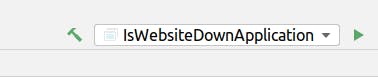
- If the Run button at the top is Active (i.e. of Green Color), then click on that to run the application.
- If not, then follow the following steps:-
- Go to
IsWebsiteDownApplication.javaclass - You'll see a Green Arrow, to start the server.
- Go to
- From, next time, we'll see the Run button at the top also active.
- If the Run button at the top is Active (i.e. of Green Color), then click on that to run the application.
Open Postman, and using that sends a GET request to
http://localhost:8080/checkwith a Query Parameter of name "url" and value of "google.com". The postman window would look something like this: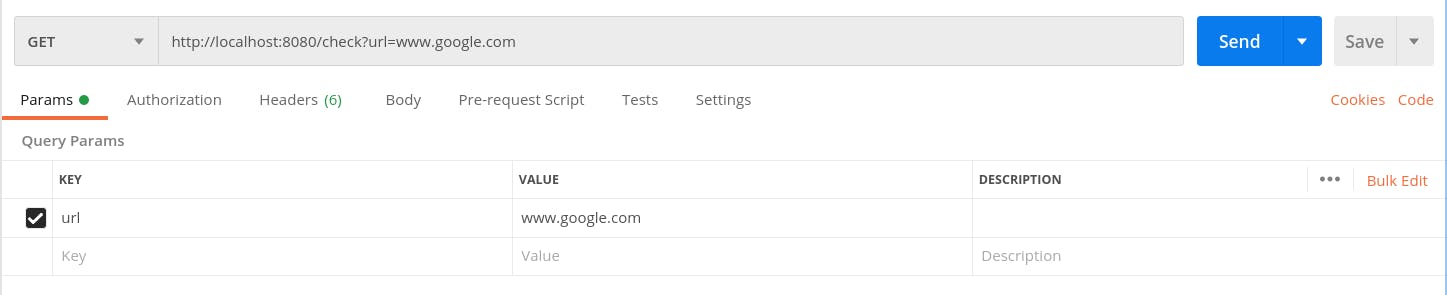
Now, click on the "Send" button and you'll see a response of "200 OK" and a body with the URL which you mentioned in the query parameters. It would look something like this:

- You can try to change the URL value in the Query Parameters and see what results you get.
Step-4: Building the complete Controller
- Till now, we have created a basic Controller which returns whatever we send.
- Now, in the controller, we'll add the functionality to make an HTTP request.
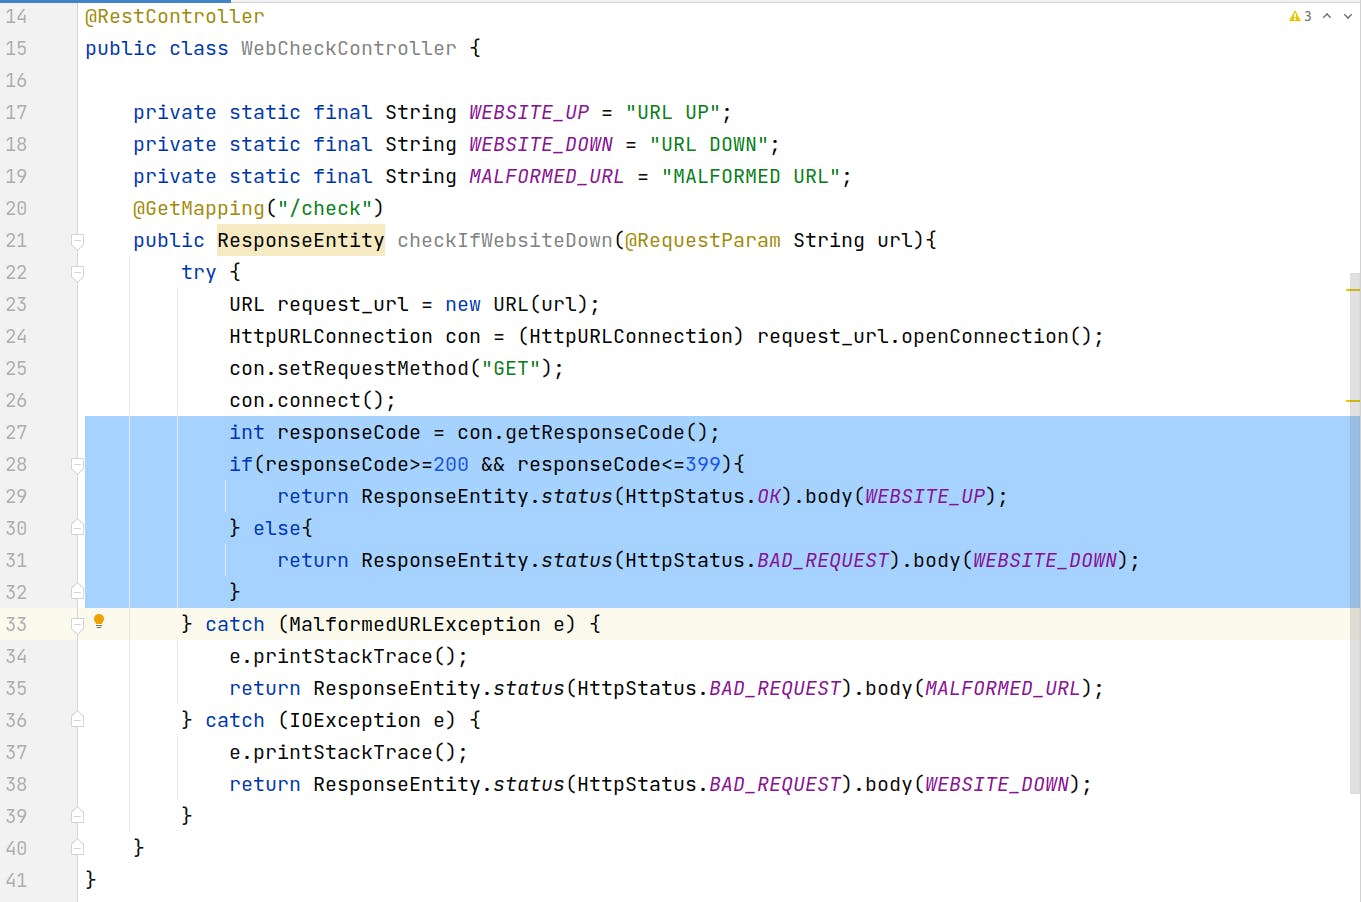
- The code for making HTTP request looks as follows:-
Now since, the Request has been made ... we'll decide if the URL is UP or DOWN, by the Status Code which we get. If the Status Code is in the range 200-299, then the URL is working fine. Further, also if it is also in the range 300-399, that is fine, since it means that the request is getting redirected. So, we can also consider that the URL is UP.
After adding the code for handling the status code, it looks like this:-
Time for Testing
Open Postman, and send the request like the one below:-
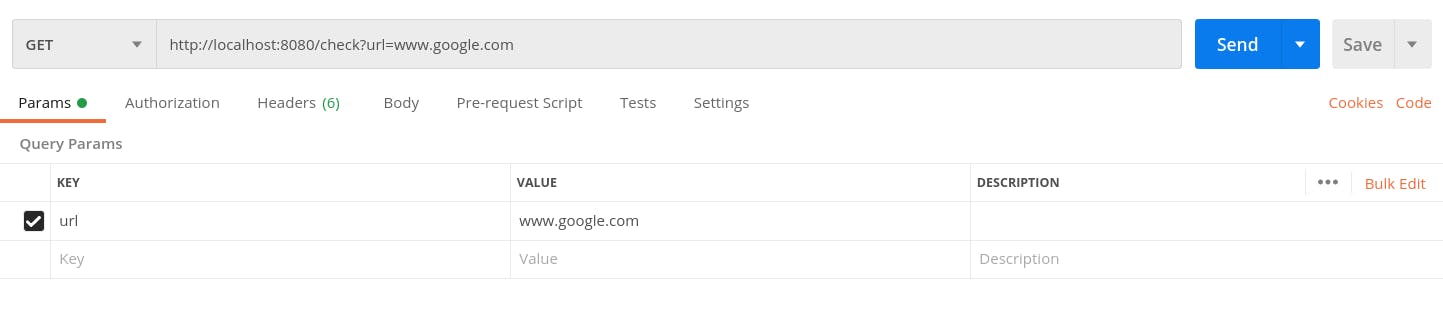
Now, we'll get an output like this

But why? Because the URL is actually malformed. Now try for
https://www.google.com
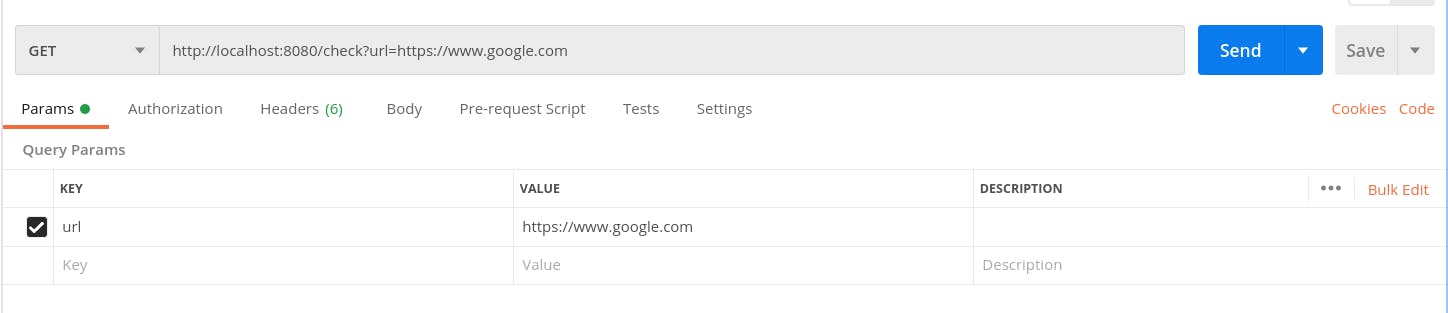
And now we get the following output:

MALFORMED URLis basically a URL that is not in its correct format. The first thing, which you would have got an idea of would have been that the URL should start withhttp://orhttps://.Now, let's try for a URL that is Down. For eg:- github.com/thesagarsehgal/random-url-testing. On opening, this page returns with the following:-
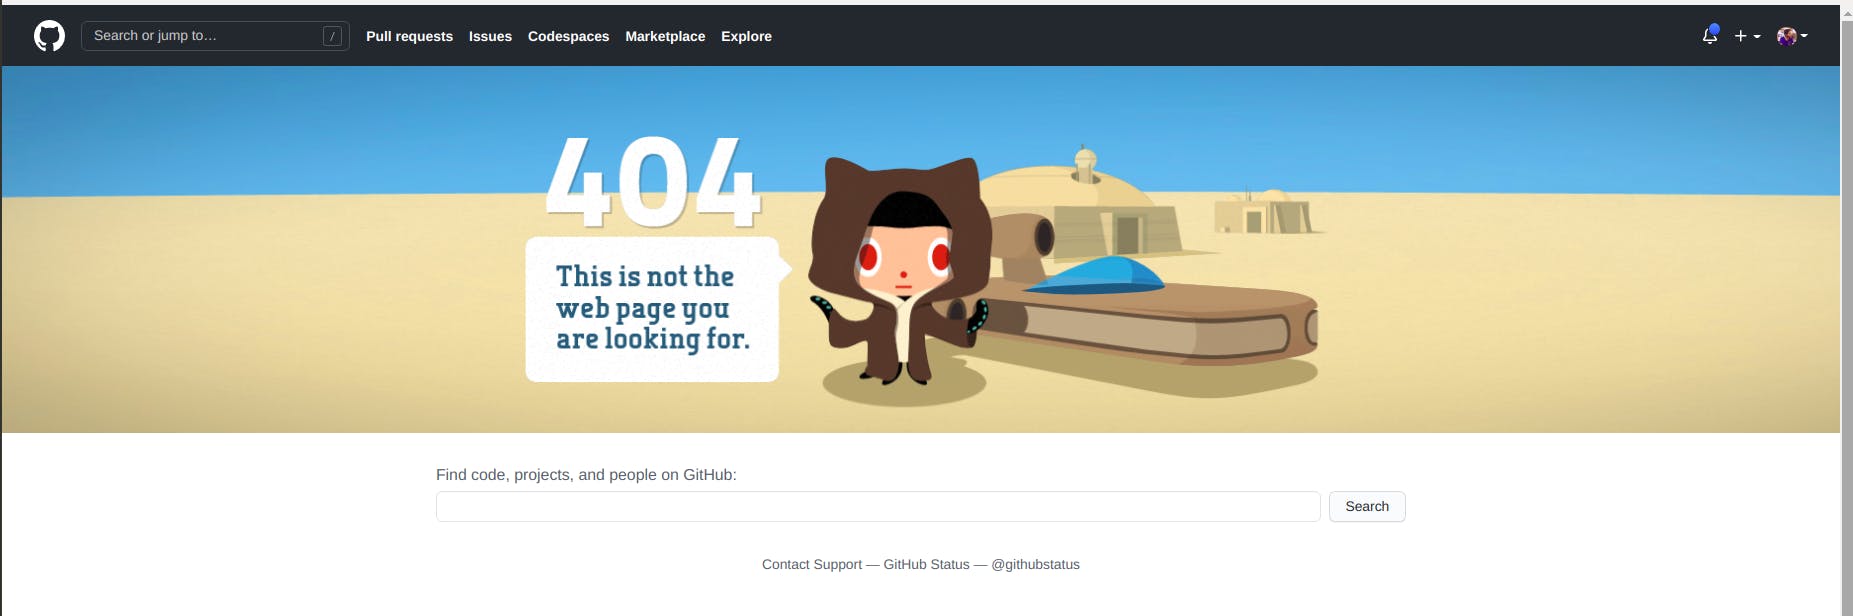
- So, on trying on Postman it looks like this:-
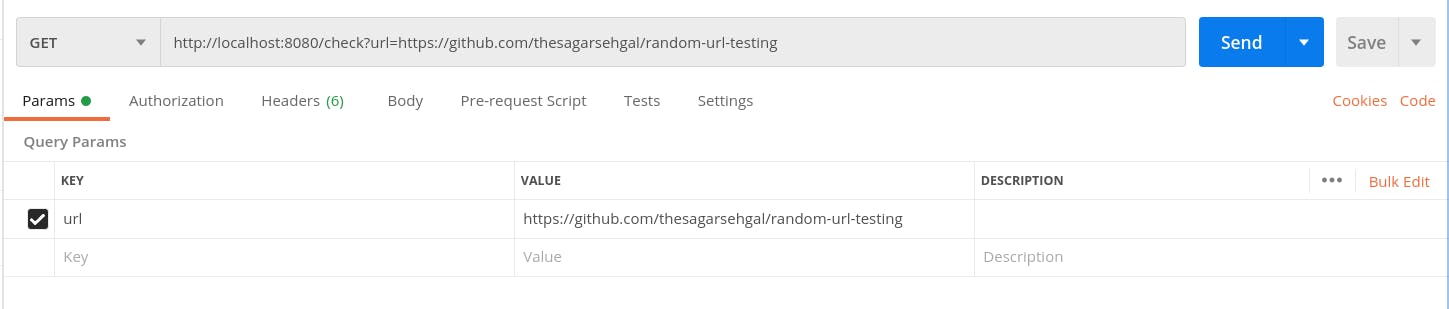
- The output looks like this:-

And with this, we come to an end of the project. You can find the complete codebase here on Github.
I hope, by now you would have got a basic understanding of Spring Boot.
Thank you for reading! Do share your feedback and suggestions in the comments below.