


Pull Request is one of the crucial steps to contribute to a project
Stuck behind the paywall? Click here to read the full story with my Friend Link!
In my previous article, I have shared an analogy to understand how to use Git to contribute to an open-source project. It would be interesting for you to follow this article if you go through my previous article once. The previous article can be found below:- Basic Git Analogy for Contributing to Open Source Project A real-life analogy for understanding basic Git required to contribute to an open-source project.medium.com
In this article, you will be seeing the complete process of submitting a Pull Request. It would be a great learning experience if you follow the process alongside reading this article.
The Task
Yes, in this article we would be doing a task. You will be sending a Pull Request to a Github Project. In that Pull Request, you would be adding your name to the Contributor’s list of the project. The Github project you would be contributing to is:- sagar-sehgal/Github-Pull-Request-Guide Contribute to sagar-sehgal/Github-Pull-Request-Guide development by creating an account on GitHub.github.com
Since the complete process requires at least 2 users, one who owns the Github Project (The Professor A) and the one who contributes (The Student B). So, for this, I collaborated with a friend so that it is easy for you to visualize the things.
Step-0: Set up Git on the system and Make an account on Github
I would be proceeding further, assuming that you have the following:-
Git installed on your system.
An account on Github.
Step-1: Fork the Github Project
Professor A sending the e-copy of the book to the Student B over the mail
Before proceeding further, please ensure that you have logged into your Github account.
Open the Github Project by going to https://github.com/sagar-sehgal/Github-Pull-Request-Guide
Now to fork, click on the Fork button at the top right corner of the screen.
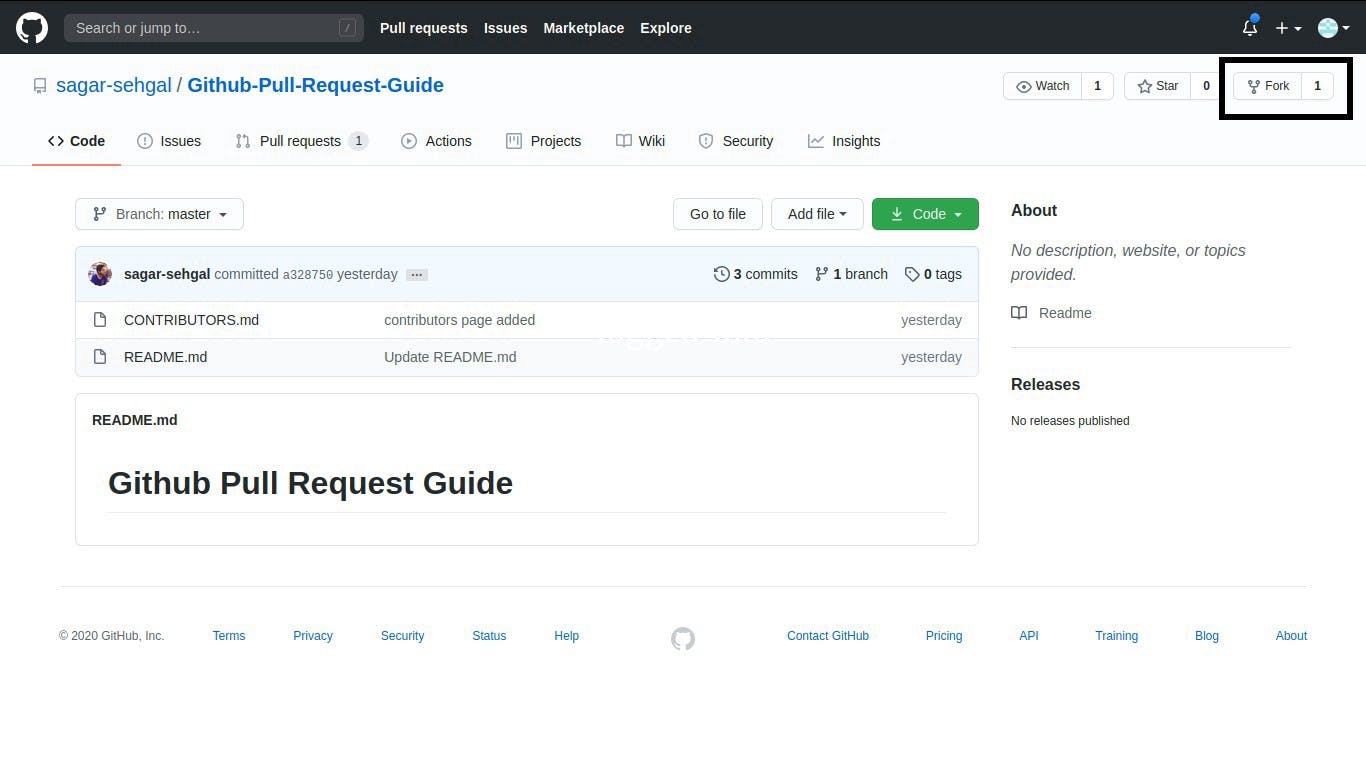 The Github Project and Fork button at the top right corner of the page.
- The process of forking the Github Project would start. It would take some time and it would look something like shown below:-
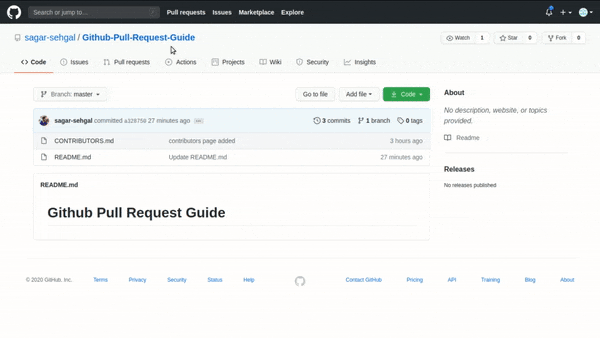 The process of forking the Github Project.
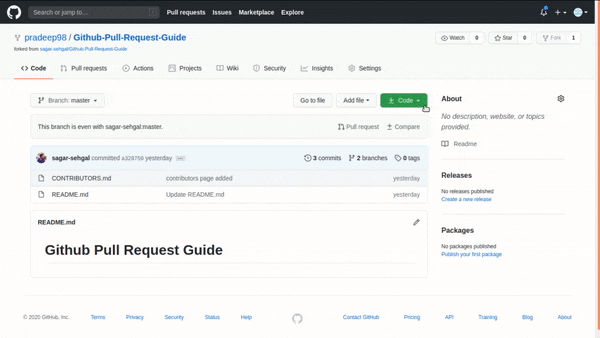
- This will create a copy of the project in your Github account as shown below:-
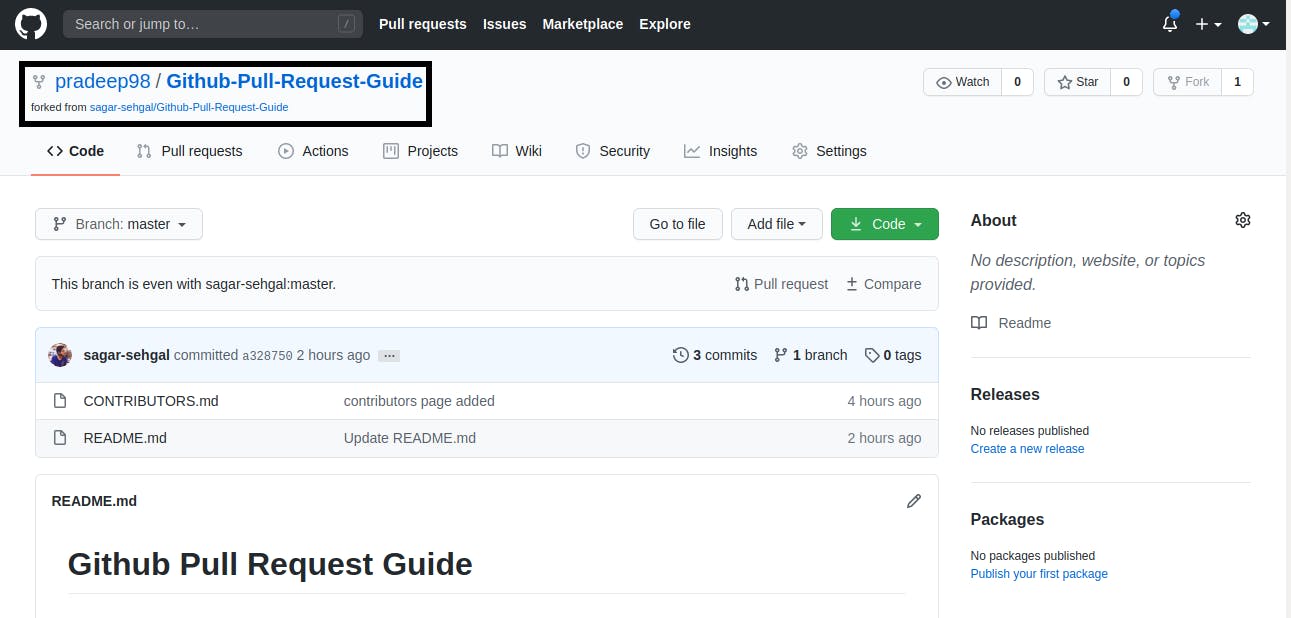 After the forking of the project is complete.
- As you can see in the top left corner of the image that a copy of the project has been made in your account. Further, it also shows the original project link just below it.
Step-2: Clone the Github Project
Getting Print Out of the book.
Before starting this process please ensure that you have Git installed in your system.
Clone the GitHub project locally as shown below:-
 The Process of Cloning the Github Project.
git clone github.com<YOUR_GITHUB_USER_NAME>/Github-Pull-Request-Guide
- Now the project has been downloaded successfully in your system. You can have a look like the list of files and folders by using the following command below:-
 Listing all the folders to check the project folder we cloned in the previous step.
LINUX: Use ls command to list all the files and folder in the current directory WINDOWS: Use dir command to list all the files and folder in the current directory
- Now you can move to the project folder which you cloned above. For this have a look at commands as shown below:-
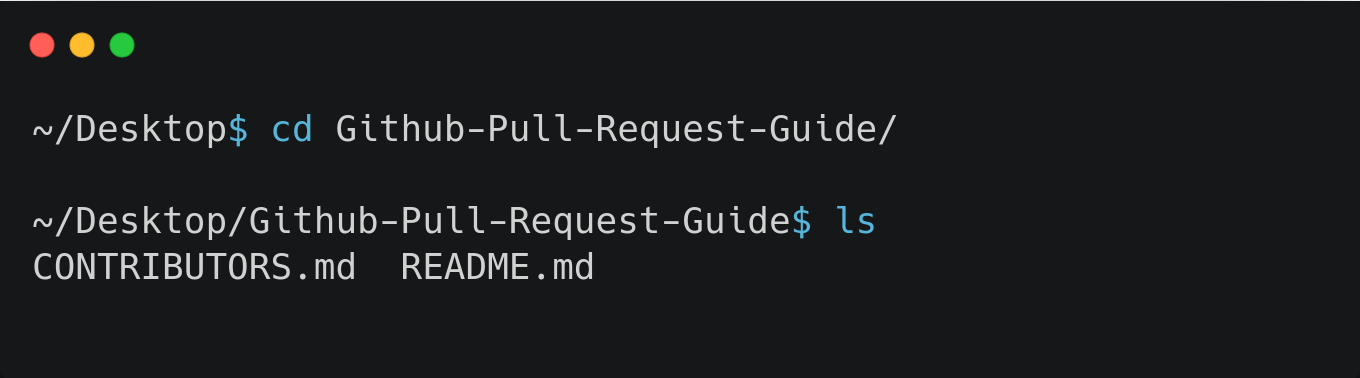 Shifting to the project directory and listing all files in the project.
cd Github-Pull-Request-Guide
Step-3: Make a new branch
Yeah, this wasn’t there in the analogy just to make the analogy easy to understand. This can be considered as making a xerox or photo-copy one of the chapters which is already printed for doing rough work :).
To start contributing, make a new branch.
Branching is a recommended practise which is done so that the main branch remain unaffected if you break the working code. It can be considered like a way you used to do your homework assignments during school time. First in rough followed by making a main copy of the assignment so that the main copy of the assignment remains clean.
 The Process of making a new branch.
git checkout -b add_my_name :- This command is used to create a new branch and shift to that branch. Here add_my_name is the name of the new branch which you are creating. git branch :- This command is used to list all the branches of the project you have on your system.
- Now that a new branch has been created and you have been moved to your new branch, you can make changes in the project.
Step-4: Make changes in the project
Student B working on the changes in the book.
- So, you will add your name to the list of Contributors in CONTRIBUTORS.md. You can open the file and add your name. The process of doing this can be seen below:-

You can use any editor to make the changes in CONTRIBUTORS.md file.
Step-5: Commit the changes made
Finalizing the changes that have been made in the book i.e. finalizing the changes using a Pen which was earlier written using a Pencil.
- Once you are done with the changes, the status can be checked as shown below:-
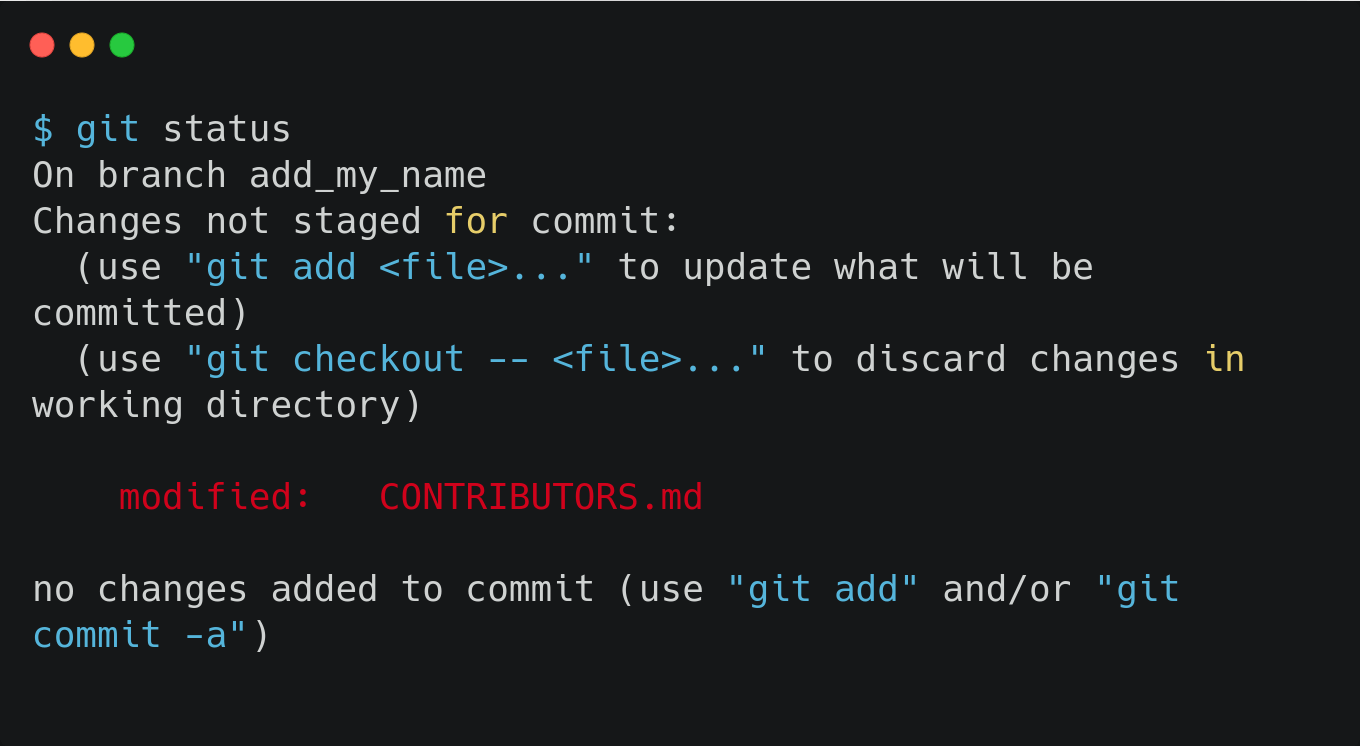 Checking the status of the branch after making changes in the files.
git status :- This command is used to check the status of a git project locally. Like in this case it shows the files that have been modified. The red color of the files shows that the changes that have been made have not been added yet.
- Once you are done with the changes then you can add all those changes. This can be done as shown below:-
 Adding the changes and then checking the status of the project.
git add * :- This command is used to add all the changes made. After adding git status has been used to check the status. Since all the shanges have been added, this time it showed green color.
- Once all the changes are added, you can commit the changes as shown below:-
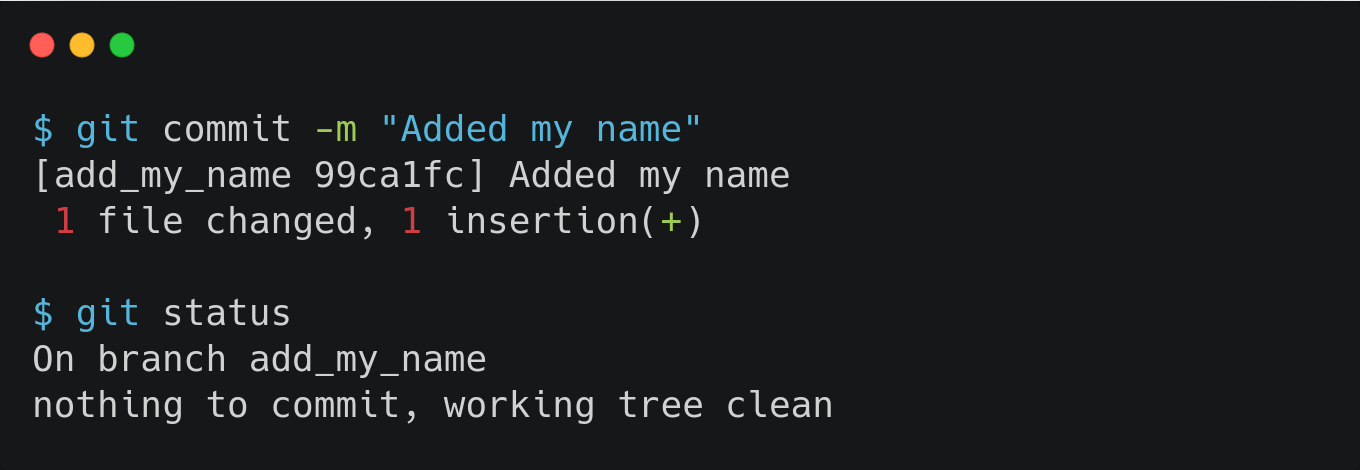 Committing the changes and then checking the status of the project.
git commit -m “Added my name” :- This command is used to make a commit. Further -m part here refers to the message which can be attached along with the commit. As you would have seen after commit, the git status dosen’t shows up any Green or Red color message. Since all the changes which were made have been commited and no more changes are there, therefore no modified files. Thus no Green or Red color message.
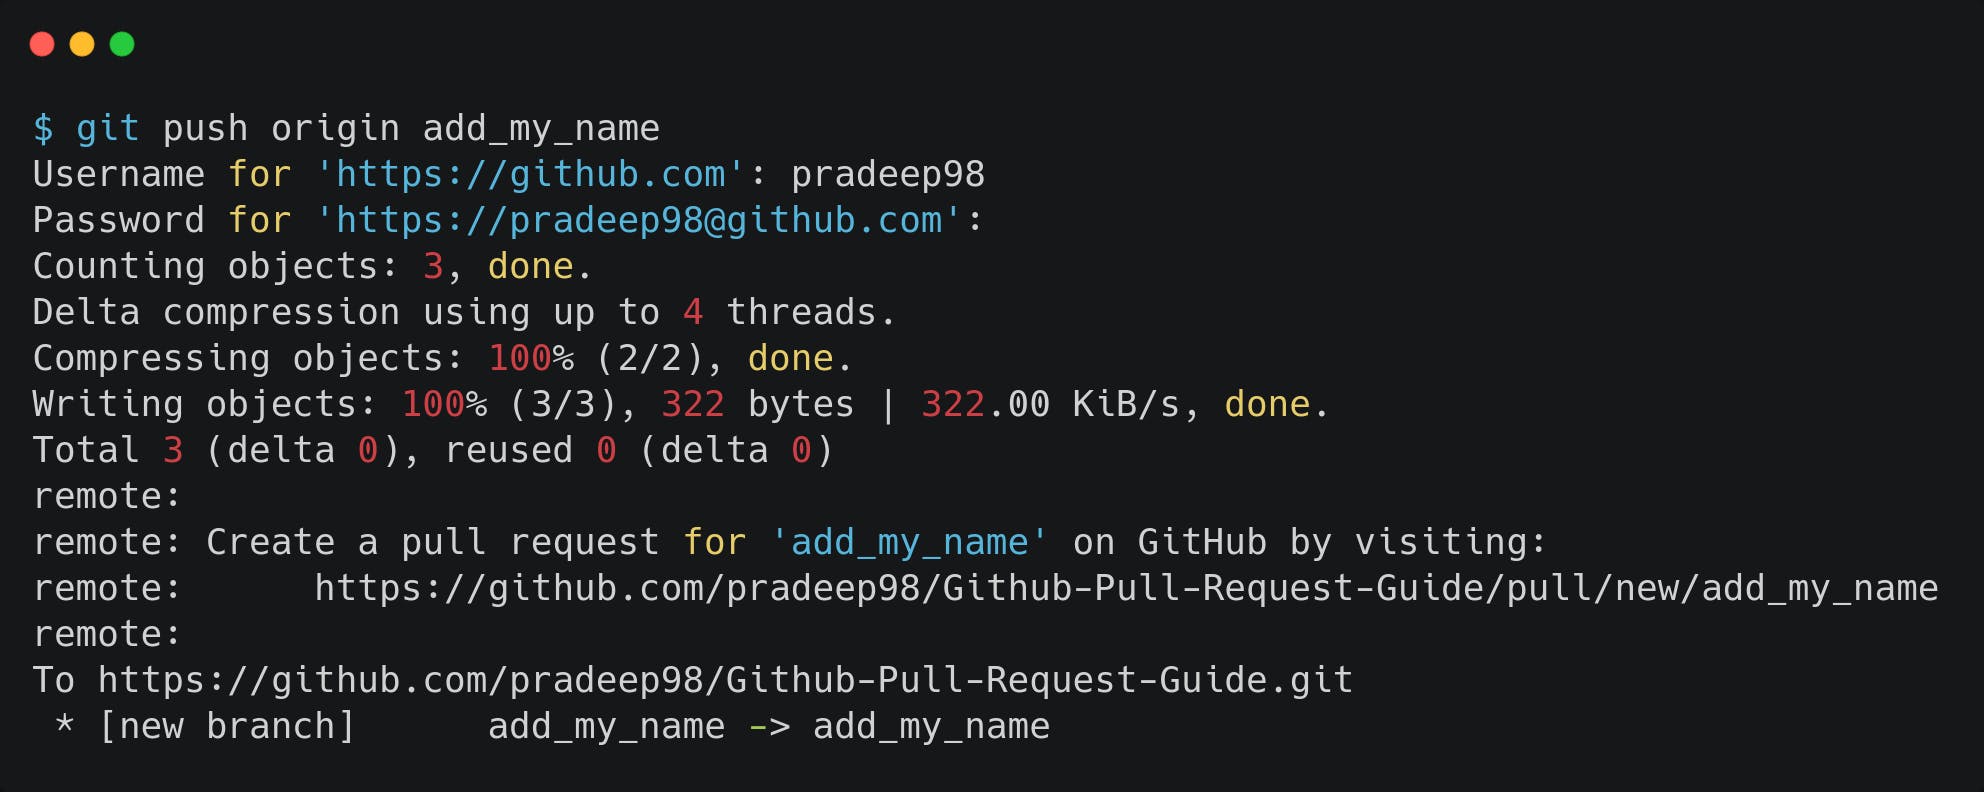
Step-6: Push the changes
Updating the changes from the local copy to the e-copy of the book
- Once the changes are added and committed, you can push the changes on the Github. This can be done as shown below:-
 Pushing the changes.
git push origin add_my_name :- Here add_my_name is the branch you created earlier. After this, the username and password have been asked for authentication, and after authentication is complete the changes are pushed.
- Further, as you can see the messages after pushing the changes, that the changes have been pushed and to make a Pull Request, you can visit the link which comes in the message after pushing the changes.
Step-7: Send a Pull Request
Mailing the changes back to Professor A
Now you can go to the link provided by Git in your system and create a Pull Request.
Also, you can go to the Github Repository which you forked on your account. You will see a new message as shown below:-
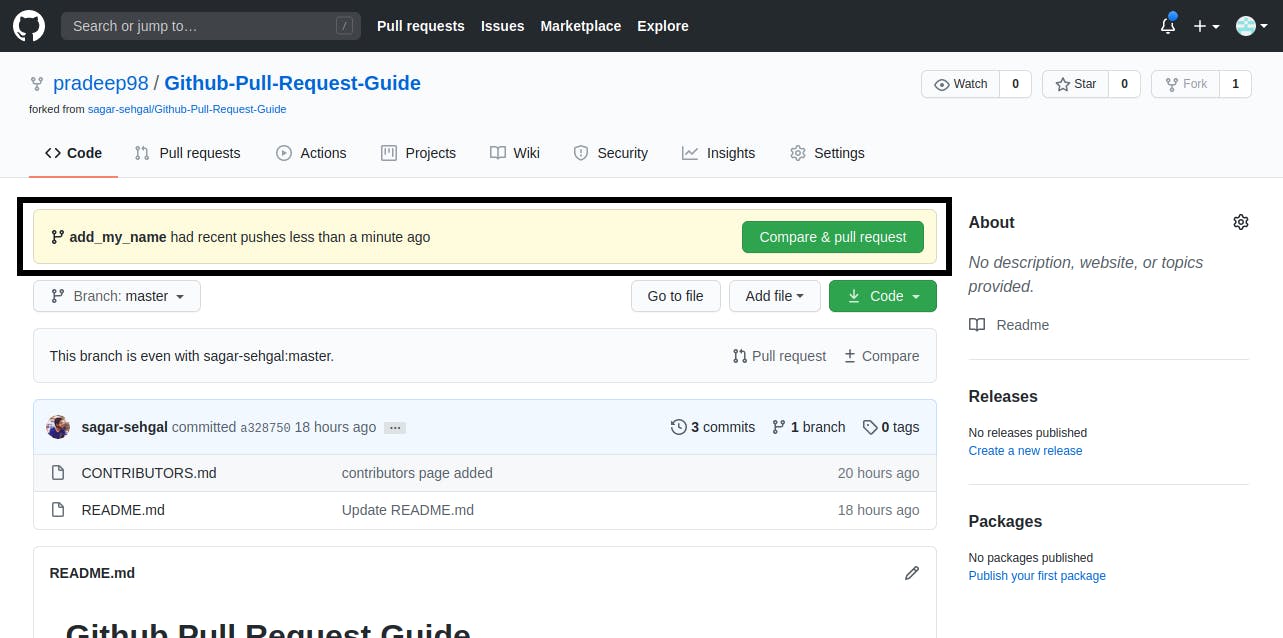 Message on the Github Repository that some changes have been pushed.
This message tells that some new changes have been pushed and you can send a Pull Request using the link provided. You can click on the “Compare and Pull Request” button.
Clicking on that button as well as opening up the link which was provided by Git would land up on the same page.
Now you can type a message which you would like to send with the Pull Request. As a part of this task, you can mention your name.
Usually, a Pull Request message contains things like that feature would be added and what all changes are made. Further, it also contains an issue number which this PR is related to.
Further after that, you can click on the “Create Pull Request Button”. You can have a look at an example below:-
 Typing the message for the Pull Request.
- After clicking on “Create Pull Request Button” and submitting the Pull Request, it would look like as shown below:-
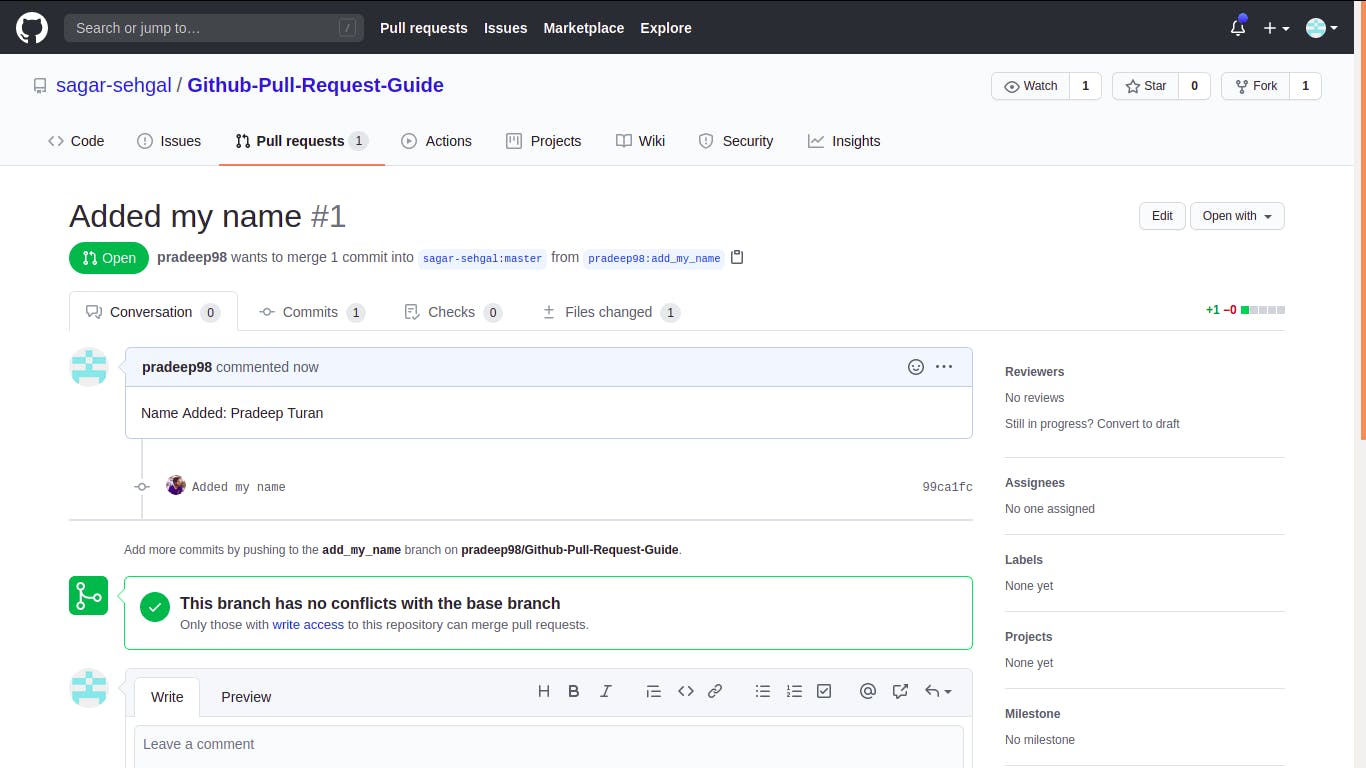 Screen after submitting the Pull Request.
- And you have successfully made a Pull Request.
Congratulations, you have successfully learnt to create your first Pull Request.
So, I hope if you would have followed the article till here, then surely you would have learnt how to make a Pull Request. Making a Pull Request will bring you one step closer to contributing to a Project.
I would like to thank Pradeep Turan for his support. It would have been really difficult to record the GIFs without his help.